How do I take care of an orchid plant?
The Basics of Orchid Care: A Beginner’s Introduction

As one of the largest plant families in existence, orchids may appear most fragile but are actually quite hardy. Many of the most popular indoor orchids (like Phalaenopsis, or moth orchids) come from tropical climates and naturally grow up in the trees… not on soil. They are a little different in that they live a life you do not discover in your common houseplant. So, how do you care for an orchid plant?
1. Light: Finding the Perfect Spot for Your Orchid
Caring For Orchid Plant
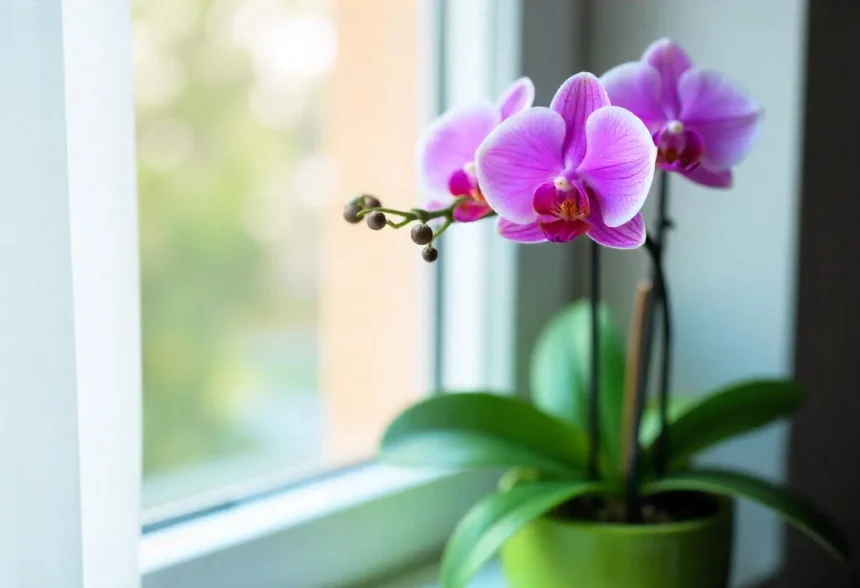
Put your orchid in a north- or east-facing window where it will have indirect light for most of the day. Too much light will turn the leaves yellow, not enough and it will remain a nice deep green.
Tip: If your window gets harsh direct sunlight you could also use a sheer curtain or something to diffuse your light.

2. Watering Orchids: When and How Much?
One of the most tricky areas of orchid care is watering. If you overwater this plant it can cause root rot and underwatering it will make the plant mimic that of other lucky bamboo plants. Then, how to water an orchid plant?
Most orchids like to be allowed to dry a bit between waterings. Consider factors like the temperature of your apartment, relative humidity and the type of potting medium you used to determine how often your plant needs light watering. A general rule of thumb is to water your orchid once a week in the summer months and every 10 to 14 days in the winter.
Pro Tip: Water should be room temperature, and you need to avoid getting water on the leaves which can cause fungus. Make sure the water drains entirely so that your plant is not sitting in any water.
3. Humidity: Creating the Ideal Environment
Orchids are typified by moisture-loving tendencies; they, in fact, revel in humid conditions, reminiscent of their native tropical home. Most homes have relatively low humidity, especially when those heating systems get cranked up throughout winter months. To keep your orchid happy, aim for humidity levels between 50-70%.
Tip: To raise the humidity around your orchid, you can set it over a shallow tray filled with water, though not touching the water. You might use a humidity tray. It is also worth misting the air around the orchid, taking a great deal of care not to mist the orchid’s leaves.
4. Fertilizing Orchids: Feeding for Growth
Orchids are not heavy feeders, however they do need to be fed regularly In order to promote healthy growth and blooms. Feed with a balanced water-soluble orchid fertilizer. Fertilize your plant once every 2-4 weeks during the growing season (spring, summer) and less frequently in fall and winter.
Tip: Adhere to the “weakly, weekly” rule by filling it in at fifty% drink 1 time a week. This ensures that you do not run the risk of burning your lawn with fertilizer.
Common Orchid Problems and How to Fix Them
Some orchids run into problems, even in the best care. Key To Keeping Your Plant Healthy The signs you are able to spot early will let you know how healthy your plant is going to be. If you are an orchid grower that is constantly having problems with your plants, listen to this simple advice: take a beat.
1. Silent Orchid Killer — Root Rot
What to do when orchids have root rot
Root rot , Probably the most common problem that many grower face due to over water or potting mix with poor air flow which result in root rotten. Firm, white (or wet green) roots = Healthy Orchid Roots This issue is likely root rot if the roots are brown or mushy and they stink.
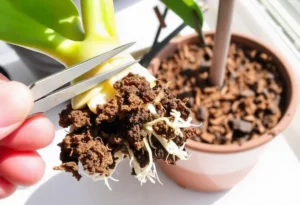
In case of a diagnosis, this health issue is easily fixable through proper care — just take it out of the pot and troubleshot trim-gardening scissors away all diseased roots. Repot the orchid in fresh, well draining orchid mix and ensure you water it properly to avoid future problems.
Tip: While repotting, a burning candle can be applied over the chopped roots to prevent entry of water in it and making damage layer bigger.
2. Yellowing Leaves: A Sign of Stress
Yellow leaves can signal everything from too little light to overwatering to nutrient deficiencies. Yellow leaves on your orchid require an examination of the environment in which it resides. Is it receiving too much direct sun? Am I giving my orchid the right amount of water? You can make the necessary adjustments once you have located the cause.
Tip: If it’s only bottom leaves, this could be part of that normal cycle in the growth in an orchid where the old leaves just die off.
3. Failure to Bloom: Encouraging Your Orchid to Flower
Taking Care of Orchid Plant to Bloom
Proper care can prevent under-performance of an orchid, and one of the typical issues often reported by orchid owners is that their plant refuses to bloom. Orchids can be extremely fussy bloomers, but with patience and ideal conditions youll find yourself surrounded by some of the most beautiful blooms on earth.
TIP: in order to induce blooming, ensure your orchid receives ample light (without direct sunlight) and that it is slightly cooler at night (around 55-65°F). This decrease in temperature helps to initiate the flowering season.
Repotting Your Orchid: When and How to Do It
Repotting, which must be done every 1-2 years or when the potting medium is no longer draining properly, is a critical part of orchid care. Because orchids like to be root-bound, repotting them too often can have detrimental consequences.
The next thing to do is to transfer it over; if you must re-pot, use a pot that is only slightly larger than the prior with an orchid mix of material such as pine bark, pumice and sphagnum moss. These materials attempt to simulate the environment where your orchid originated from and work to be very airy.
Step-by-Step Guide to Repotting Your Orchid
- Gather your materials: a new pot, fresh orchid mix, sterilized scissors, and a work area.
- Remove the orchid from the old pot: Gently shake the roots free from the old potting medium.
- Remove any damaged roots: Inspect for soft, brown roots. Cut these roots using your sterilized scissors.
- Place the orchid in the new pot: Position the orchid in the pot so that the base of the plant is just above the surface of the medium.
- Fill in with orchid mix: Gently fill in the fresh orchid mix around the roots, being careful not to pack it in too tightly.
- Water the orchid: Give your newly repotted orchid a good soaking, then let drain completely.
The Importance of Patience: Orchids Take Time
It does not care to grow orchids as you can imagine. They are slow, have their own schedules and often take months to show a sign of bloom or even years in certain orchids. If no flowers appear instantly, do not despair; your orchid will eventually pay you back in wonderful-looking blossoms.
Conclusion: How Do I Take Care of Orchid Plant? Your Final Checklist
Finally, a recap of the main steps that guarantee a healthy orchid plant:
Light: Bright, indirect light.
Watering: Weekly, let plant dry slightly between waterings
Humidity : Target a 50-70% relative humidity.
Fertilizer: Feed with any general use water-soluble fertilizer every month during the growing season.
Repotting: Repot 1-2 yearly with a good, veggie filling orchid blend.
If you adhere to above guidelines and listen to your orchid’s needs, you will one step closer to becoming an expert in realistic orchid nurturing. Just remember guys, good things come from consistency, patience and knowing how to read what is going on with your plant.
If you want more ideas, check out this post on caring about your indoor plants, and make sure to check our in-depth guide here!


